The Jellybean Junction Blog
My colourful crochet adventures
07 Oct 2018
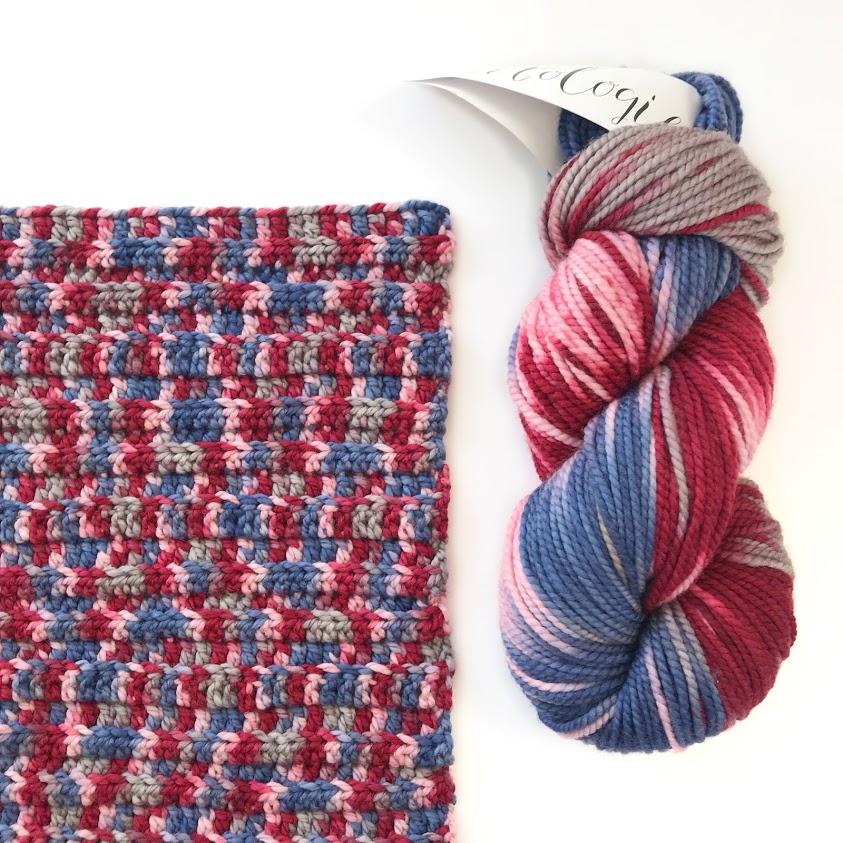
I love crocheting hats for my boys, they get a new one every year whether they need it or not. They are great ‘stash busters’ and I often use up yarn I already have as you don’t need a lot. This year I used something a bit more special and my children now have super cosy new hats I am really proud of. They are made using gorgeous 100% merino yarn I got from Knitcrate, a monthly subscription box.
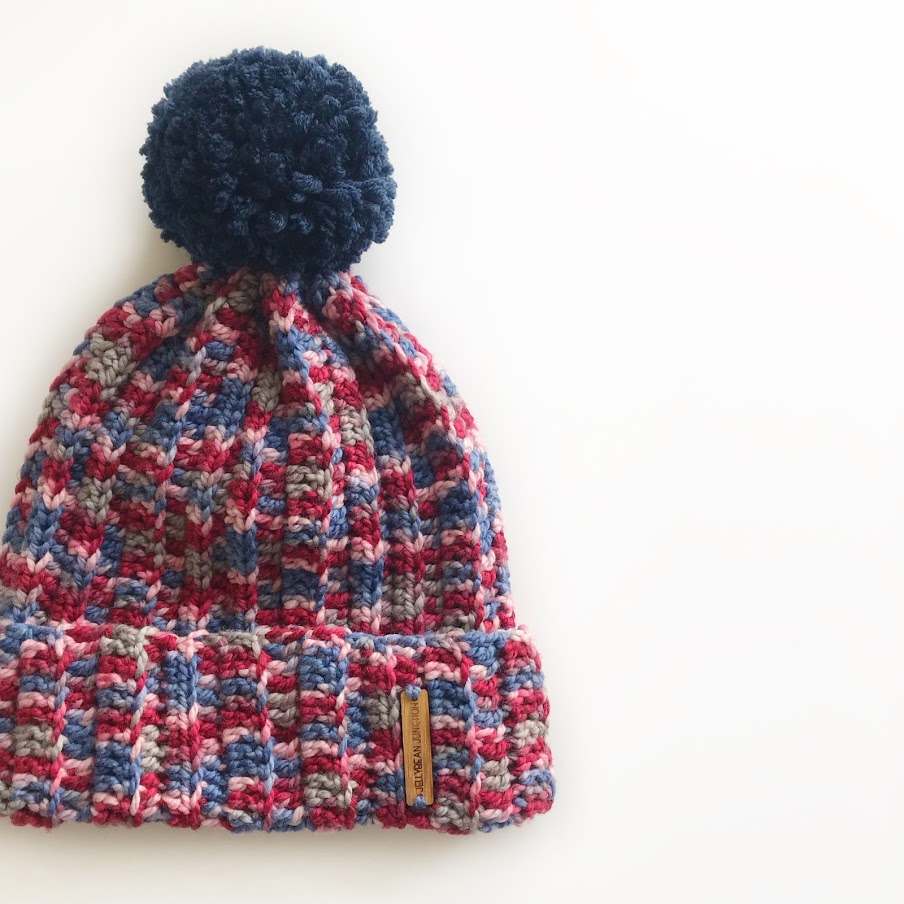
The pattern I used to make the hat is one that I made up as I went along, it created a lovely ribbed texture by using a simple combination of basic crochet stitches. I have included the pattern below although I haven’t given specifics as you will need to measure the head its intended for – as I did! I’ve given details of how to do this below…
——————–
Abbreviations:
Pattern is written in UK terms.
——————–
Before you start you will need to measure the head you are making the hat for. Measure the distance from the top of the crown to the bottom of the ear. Add 7cm to this length to allow for a turned up brim (you may want to add less if you are making the hat for a baby). This measurement will be what you use when hooking the starting chain.
Note – My hat was made using an Aran weight yarn and a 4.5mm hook. The pattern will work for any weight yarn just ensure that you adjust the hook size accordingly.
PATTERN
– Chain the appropriate number to reach the measurement above.
Row 1 – tr in 4th chain from the hook and then along to the end, turn.
Row 2 – ch 3, working in the back loops only (blo) tr to the end, turn.
Row 3 – repeat Row 2.
Row 4 – ch 2, working in the back loops only (blo) htr to the end, turn.
Row 5 & 6 – repeat Row 4
Continue working 3 repeats of Row 2 followed by 3 repeats of Row 4 until the piece of crochet stretches comfortably around the head.
At the end of the last row, fold your work in half and slip stitch the top and bottom rows together to form a tube, fasten off leaving a long tail. Using a darning needle and the long tail sew a running stitch around the top of the hat until you get back to where you started. Pull the tail to close the hat, secure and weave in ends.
To form the brim simply fold up the bottom of the hat, if you want to secure it just use a few small stitches with the same yarn to hold the brim in place.
I added a big fluffy pom-pom to finish!
——————–
I really hope you enjoy this pattern! Please remember to tag me in any Instagram posts as I’d love to see your makes (@jellybean_junction).
Happy hooking x
Posted in Free pattern